Installation
Slicer for Mac is available on all Slicer license tiers. We've tested on macOS Sequoia and Tahoe. slicer-mac does not need sudo.
Install the binaries
You need three binaries: slicer-mac (the daemon), slicer (the CLI client), and slicer-tray (the menu bar app).
If you have the Invididual tier, then first, install the slicer CLI and activate your license:
curl -sLS https://get.slicervm.com | sudo bash
Setup the license key
If you have a subscription for Slicer Individual, Team or Platform, then you'll have received a license key via email. Save it to ~/.slicer/LICENSE. This license will not expire, so long as your subscription remains active.
Note for GitHub Sponsors (not Polar): after installation, you should run
slicer activateto link your GitHub account to your Slicer installation. The keys for sponsors last for 30 days, but can be refreshed using the same command.
Then use the CLI to install the Mac-specific binaries to ~/slicer-mac:
slicer install slicer-mac
The slicer command acts as an API client to Slicer for Mac. It'll automatically discover the socket at ~/slicer-mac/slicer.sock, so you won't need to set --url or SLICER_URL.
Initial configuration.
As a new user, we recommend you do not change the default configuration in any way.
First of all, get used to it, leave it in the path we recommend (~/slicer-mac) and explore the use-cases you have in mind.
The slicer-mac OCI bundle includes a default slicer-mac.yaml in the folder after install, so you can use that file directly.
The generated slicer-mac.yaml has two host groups:
slicer(count: 1) - your persistent Linux VM, starts with the daemonsbox(count: 0) - ephemeral sandboxes, launched on demand for things like coding agents.
config:
  host_groups:
    - name: slicer
      count: 1
      vcpu: 4
      ram_gb: 8
      storage_size: 15G
      share_home: "~/" # Set to "" to disable sharing
      rosetta: true
      network:
        mode: nat
        gateway: 192.168.64.1/24
    - name: sbox
      count: 0
      vcpu: 2
      ram_gb: 4
      storage_size: 15G
      rosetta: true
      network:
        mode: nat
        gateway: 192.168.64.1/24

  image: "ghcr.io/openfaasltd/slicer-systemd-arm64-avz:latest"
  hypervisor: apple

  api:
    socket: "./slicer.sock"
The share_home field maps your Mac home directory into the VM via VirtioFS. Set it to "" to disable sharing entirely, or to a sub-path like "~/code/" to limit what the VM can see.
Need Rosetta for x86_64 binaries? Follow Enable Rosetta.
Run the daemon. The first run pulls and prepares the VM image automatically.
If you ever need to regenerate the slicer-mac.yaml file, you can do so with the command below:
cd ~/slicer-mac
./slicer-mac new > slicer-mac.yaml
Start the daemon
Start slicer-mac:
cd ~/slicer-mac
./slicer-mac up
Start the menu bar app (optional)
The menu bar is an optional extension that gives you quick access to VM status, shells, and controls:
cd ~/slicer-mac
./slicer-tray
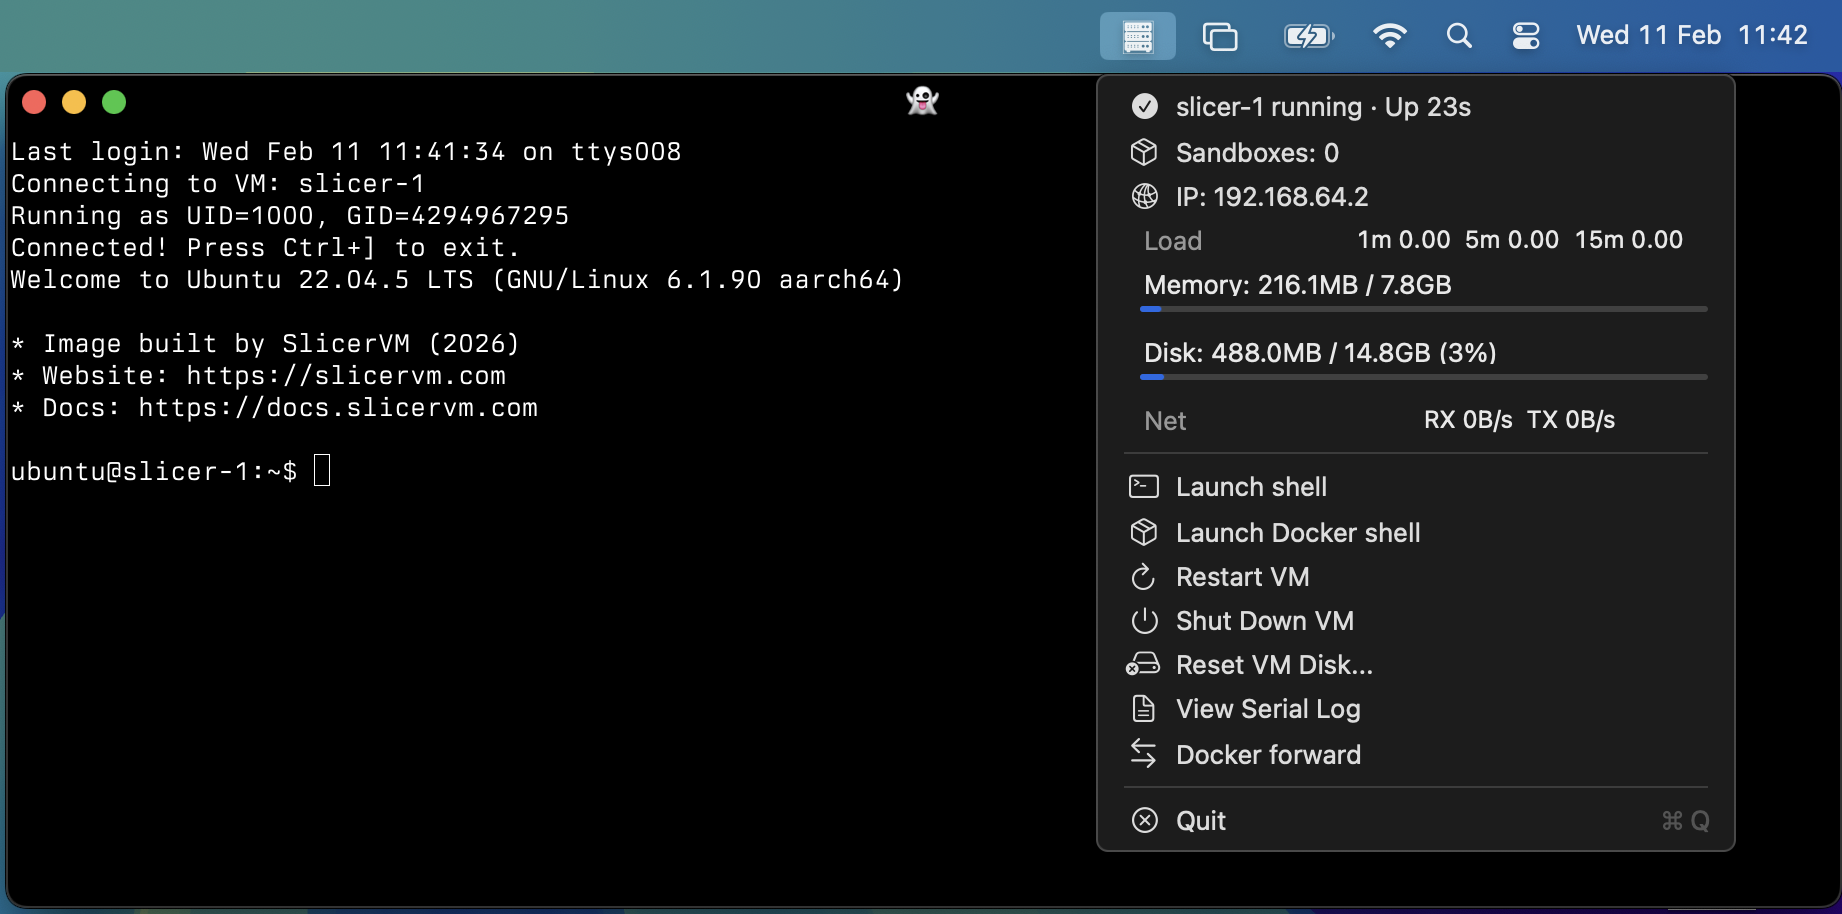
The Slicer menu bar showing a running VM with options to open a shell, view logs, or shut down.
By default, shells open in Terminal.app. For Ghostty or another terminal:
slicer-tray --terminal "ghostty"
Set up the Slicer CLI
Verify it's working:
slicer vm list
HOSTNAME          IP              STATUS     CREATED
--------          --              ------     -------
slicer-1          192.168.64.2    Running    2026-02-10 12:46:14
The slicer-1 VM is your main development environment, and is persistent.
You can shell into it with:
slicer vm shell slicer-1
To launch temporary VMs, run the following to launch a new VM into the sbox host group:
slicer vm launch sbox
Then:
# The following will show the two VMs:
slicer vm list

# Access a shell
slicer vm shell sbox-1

# Copy a file in
slicer vm cp ~/file.txt sbox-1:~/

# Use that file, remotely via exec:
slicer vm exec sbox-1 -- stat ~/file.txt

# Delete that VM
slicer vm delete sbox-1
Start Slicer for Mac with your system
If you'd like to enable Slicer for Mac as a start-up service, you can run the following:
cd ~/slicer-mac

# Simplest, without tray icon / menu:
./slicer-mac install --no-tray

# With tray icon / menu:
./slicer-mac install
Once running in the backgroud, you can use the slicer-tray service commands to manage it.
The daemon service is slicer-mac itself, and the tray service is the slicer-tray menu bar helper.
cd ~/slicer-mac

# Check the status of either service:
./slicer-mac service status daemon
./slicer-mac service status tray

# View the logs from the process - if you see an error or want to know
# what's happening
./slicer-mac service logs daemon
./slicer-mac service logs tray

# Stop or Start a service for a period of time:
./slicer-mac service stop daemon
./slicer-mac service start daemon
You can turn off the start-up service with:
cd ~/slicer-mac
./slicer-mac uninstall