Run a Headless Coding Agent with OpenCode
We'll run a headless coding agent within a microVM using OpenCode, an open-source tool to generate code using large language models (LLMs).
OpenCode occasionally supports free trials for popular LLMs. This guide was written whilst Grok's Coder model was available for free - and at no cost.
OpenCode supports various model providers including GitHub CoPilot, OpenAI, Ollama (self-hosted models), and Anthropic.
This example is very minimal and can be tuned and adapted in many ways to suit your workflow.
The general idea is that everything is orchestrated via an initial userdata script:
- Install opencode CLI.
- Configure model authentication using a pre-defined config file
~/.local/share/opencode/auth.jsonfrom another machine like your workstation. - Set the agent working away as a systemd service, with a prompt set in the userdata file.
This example is one-shot, so it's designed to run to completion once, without any further interaction.
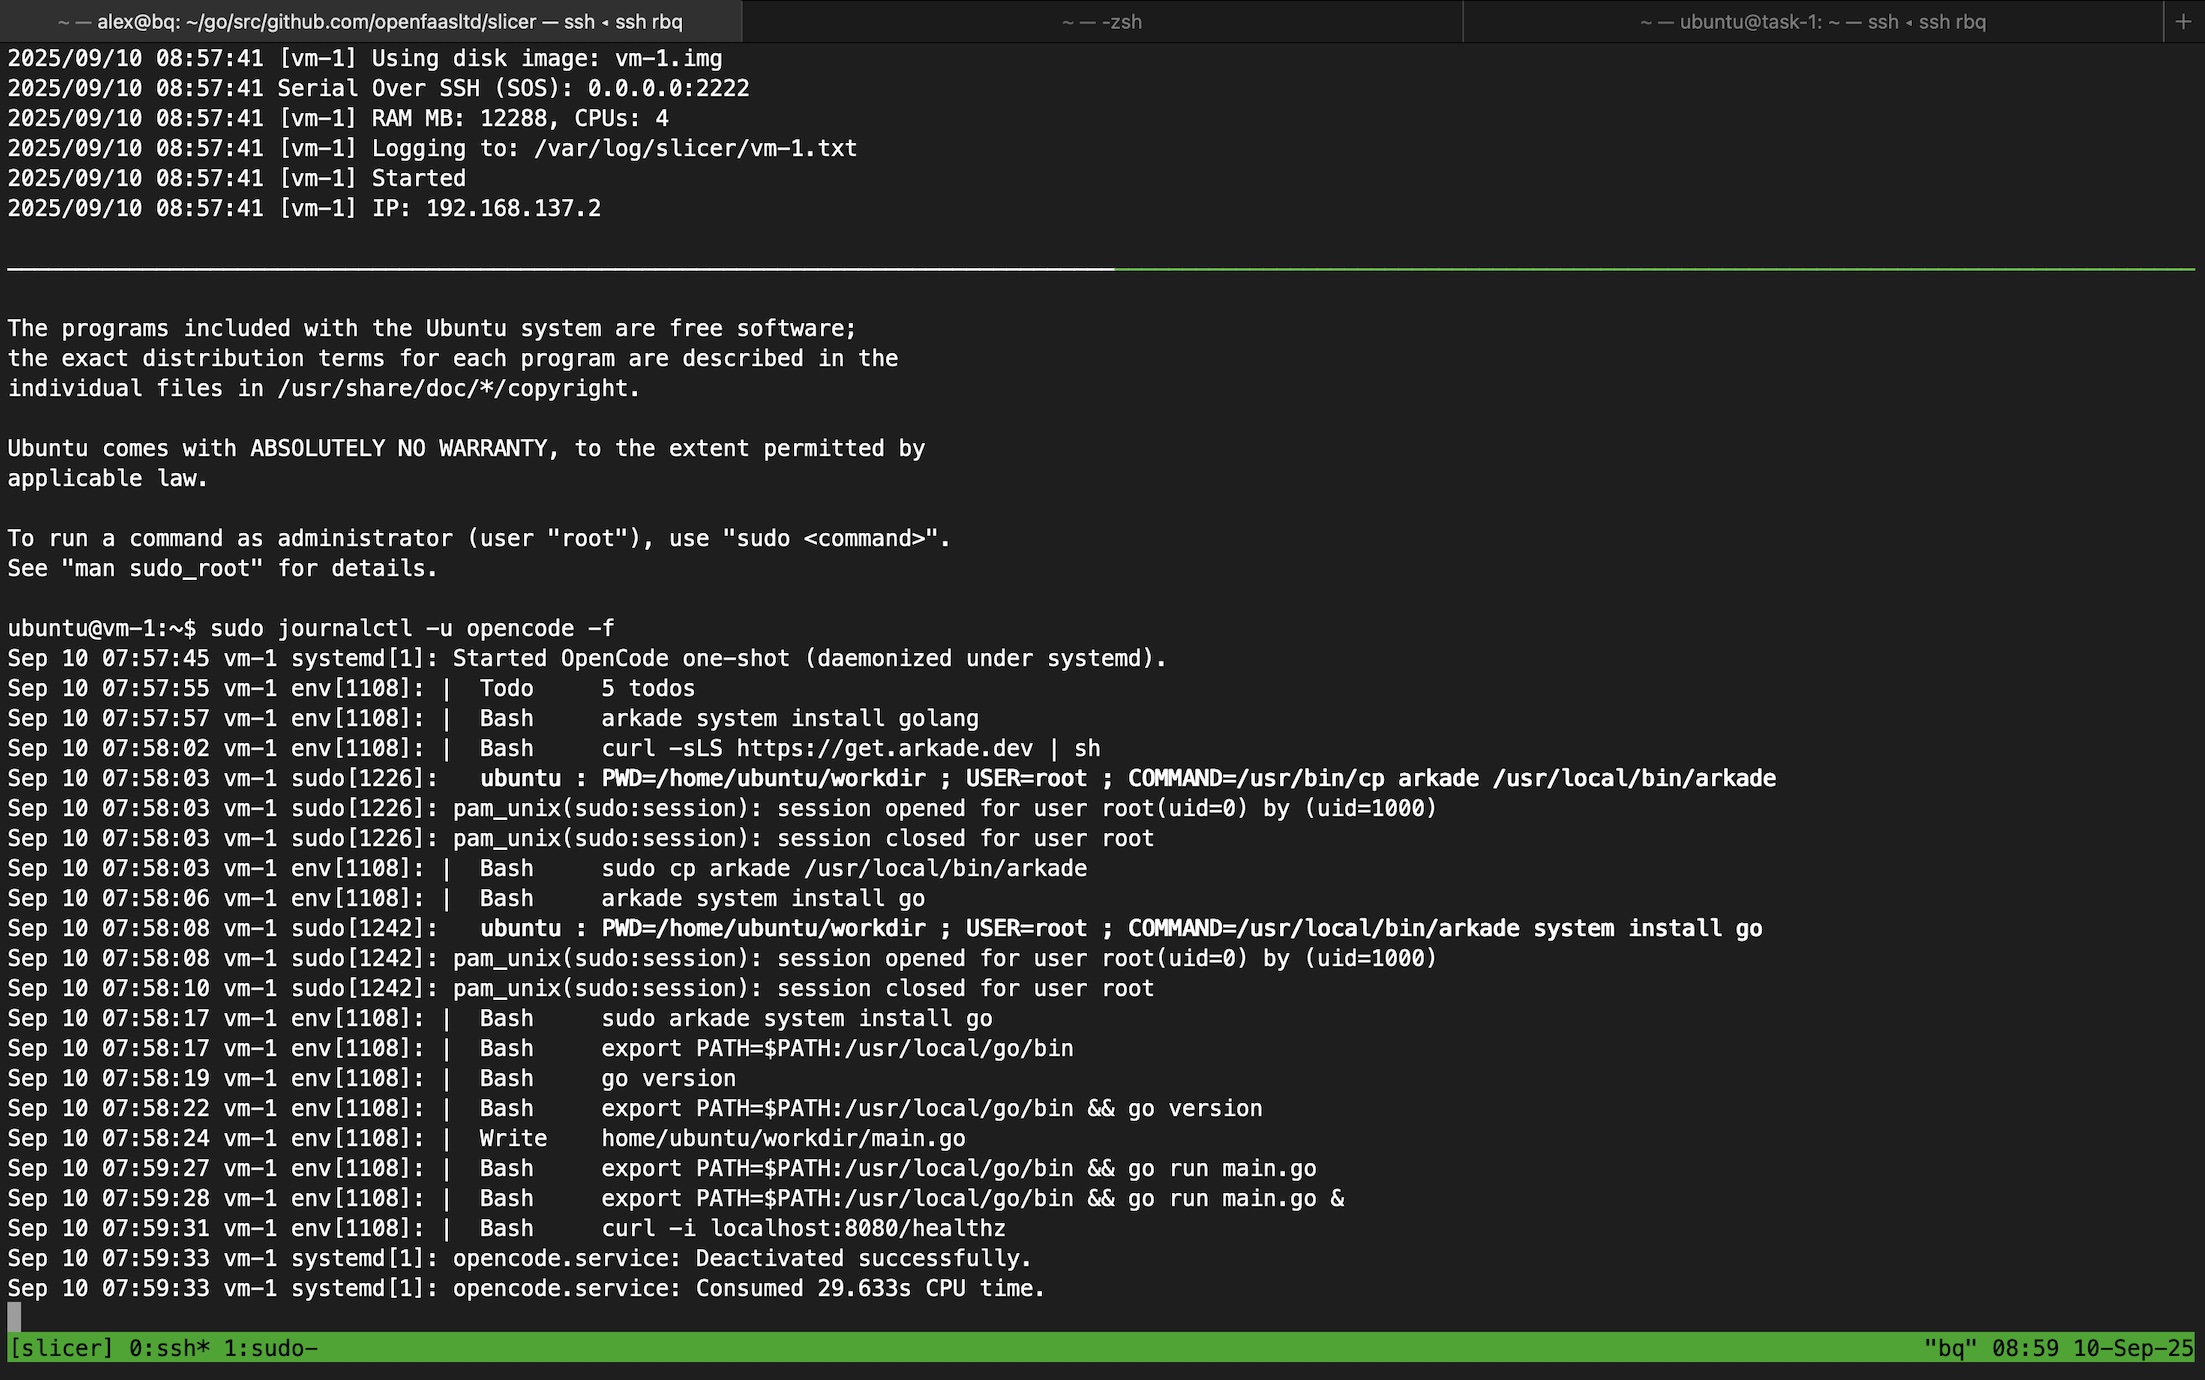
Example of a one-shot execution for a sample prompt to create a Go HTTP server, and to test it via
curl
Example config
Use slicer new to generate a configuration file:
slicer new opencode \
  --userdata-file opencode.sh \
  >  opencode.yaml
And the --ssh-keys or --github flag to add additional ssh keys so you can connect via SSH to review the logs, and/or scp to pull out any generated code.
On a computer where you've pre-installed and authenticated opencode, copy the opencode auth config file ~/.local/share/opencode/auth.json.
On host create a slicer secret for the opencode auth config file.
sudo mkdir .secrets
# Ensure only root can read/write to the secrets folder.
sudo chmod 700 .secrets

sudo -E cp ~/.local/share/opencode/auth.json .secrets/opencode-auth.json
Then, create opencode.sh:
#!/usr/bin/env bash
# Ubuntu only. Requires: curl + arkade preinstalled.
# Installs opencode, sets pre-auth, creates a daemonized systemd unit "opencode.service".

set -euo pipefail

# Install opencode -> /usr/local/bin
arkade get opencode --path /usr/local/bin >/dev/null
chown ubuntu /usr/local/bin/opencode
chmod +x /usr/local/bin/opencode

# Prep dirs & auth for user "ubuntu" (no group assumption)
for d in /home/ubuntu/workdir /home/ubuntu/.local/share/opencode /home/ubuntu/.local/state /home/ubuntu/.cache; do
  mkdir -p "$d"
  chown ubuntu "$d"
done
cp /run/slicer/secrets/opencode-auth.json /home/ubuntu/.local/share/opencode/auth.json
chown ubuntu /home/ubuntu/.local/share/opencode/auth.json
chmod 600 /home/ubuntu/.local/share/opencode/auth.json

# Task payload (edit as needed)
cat >/home/ubuntu/workdir/task.txt <<'EOF'
Create a new Go program with an HTTP server.
Add GET /healthz returning 201 "Created".
Print a git diff at the end.

Use "arkade system install golang" to install Go into the environment. Then test the program with "go run main.go" and curl localhost:8080/healthz - make sure you kill the program after confirming the correct HTTP code was returned.

Set the PATH variable to include /usr/local/go/bin so that the go command is found.
EOF

chown ubuntu /home/ubuntu/workdir/task.txt
chmod 600 /home/ubuntu/workdir/task.txt

# systemd service (daemonized under systemd)
cat >/etc/systemd/system/opencode.service <<'EOF'
[Unit]
Description=OpenCode one-shot (daemonized under systemd)
Wants=network-online.target
After=network-online.target

[Service]
Type=simple
User=ubuntu
WorkingDirectory=/home/ubuntu/workdir
Environment=HOME=/home/ubuntu
Environment=XDG_STATE_HOME=/home/ubuntu/.local/state
Environment=XDG_CACHE_HOME=/home/ubuntu/.cache
Environment=XDG_DATA_HOME=/home/ubuntu/.local/share
ExecStart=/usr/bin/env bash -lc '/usr/local/bin/opencode run "$(cat /home/ubuntu/workdir/task.txt)" -m opencode/grok-code'
Restart=no
StandardOutput=journal
StandardError=journal

[Install]
WantedBy=multi-user.target
EOF

systemctl daemon-reload
systemctl enable --now opencode.service
Just before you start up the VM, make sure you customise the prompt to have the agent do whatever it is you need.
cat >/home/ubuntu/workdir/task.txt <<'EOF'

Prompt goes here
Over multiple lines

EOF
Start up the VM i.e. sudo slicer up ./opencode.yaml
What if you want to copy in a private Git repository?
One option is to include an SSH key for the agent/ubuntu user, so that it can clone the repository directly from GitHub or another Git server. To keep permissions tight, you could also simply scp the code into the microVM after it has booted, like below.
If you want to work on a private Git repository, simply have the systemd unit wait until it finds a folder within the workdir folder, and then scp the code from your host after the microVM has booted.
So if the directory was named i.e. arkade, and we'd cloned it locally, you could amend the opencode systemd unit like so:
[Service]
ExecStartPre=/usr/bin/env bash -c 'while [ ! -d /home/ubuntu/workdir/arkade ]; do sleep 5; done'
ExecStart=/usr/bin/env bash -lc '/usr/local/bin/opencode run "$(cat /home/ubuntu/workdir/task.txt)" -m opencode/grok-code'
View the results
Once the VM is running, you can check the status of the opencode service.
The code will be written to the $HOME/workdir directory.
ssh ubuntu@192.168.137.2

sudo journalctl -u opencode.service -f

cd workdir
find .

git diff
In the example of the preloaded prompt from above, we saw in ~/workdir/main.go:
package main

import (
        "fmt"
        "net/http"
)

func main() {
        http.HandleFunc("/healthz", func(w http.ResponseWriter, r *http.Request) {
                w.WriteHeader(http.StatusOK)
                fmt.Fprint(w, "ok")
        })
        http.ListenAndServe(":8080", nil)
}
To copy out the workdir, run something like this on your host:
mkdir -p agent-runs
cd agent-runs
scp -r ubuntu@192.168.137.2:/home/ubuntu/workdir .
Running an opencode agent via the exec and cp APIs
You can also run an opencode agent from bash after booting up a host, and syncing in a secret for the API keys.
slicer new opencode \
  --userdata-file userdata.sh \
  >  opencode.yaml
Create your userdata to only setup opencode, its workdir, and to sync the API secret to the correct location from the host.
userdata.sh
#!/usr/bin/env bash

set -euo pipefail

# Install opencode -> /usr/local/bin
arkade get opencode --path /usr/local/bin >/dev/null
chown ubuntu /usr/local/bin/opencode
chmod +x /usr/local/bin/opencode

# Prep dirs & auth for user "ubuntu" (no group assumption)
for d in /home/ubuntu/workdir /home/ubuntu/.local/share/opencode /home/ubuntu/.local/state /home/ubuntu/.cache; do
  mkdir -p "$d"
  chown ubuntu "$d"
done
cp /run/slicer/secrets/opencode-auth.json /home/ubuntu/.local/share/opencode/auth.json
chown ubuntu /home/ubuntu/.local/share/opencode/auth.json
chmod 600 /home/ubuntu/.local/share/opencode/auth.json
Authenticate to opencode on your host, then copy the auth file to the .secrets folder relative to where you created opencode.yaml.
#opencode auth login --provider github --token <your-github-token>

mkdir -p .secrets
chmod 700 .secrets
cp ~/.local/share/opencode/auth.json .secrets/opencode-auth.json
chmod 600 .secrets/opencode-auth.json
Now boot up the microVM, just before userdata it will synchronise any secrets placed in the .secrets folder into the microVM.
sudo slicer up ./opencode.yaml
The following command will indicate whether the userdata script has completed:
sudo slicer vm health opencode-1
HOSTNAME                  AGENT UPTIME         SYSTEM UPTIME        AGENT VERSION   USERDATA RAN
--------                  ------------         -------------        -------------   ------------
opencode-1                53s                  53s                  0.1.55          1
If you're automating the process from bash, you can also run --json for something you can parse with jq.
Define a prompt and use the cp command to sync it into the microVM:
cat > task.txt <<'EOF'

Write a simple Go program that prints "Hello, World!" to the console.

EOF
sudo slicer vm cp --uid 1000 ./task.txt opencode-1:/home/ubuntu/workdir/task.txt
Next, use the exec command to run the opencode agent interactively, streaming the response back to the host.
sudo slicer vm exec --uid 1000 --cwd /home/ubuntu/workdir opencode-1 -- opencode run -m opencode/grok-code $(cat task.txt)

# Example output:

|  Write    home/ubuntu/workdir/hello.go
Created hello.go
You can now see the response in the terminal.
Finally, copy out the results from the microVM via cp in the alternate direction.
sudo slicer vm cp --uid 1000 opencode-1:/home/ubuntu/workdir/main.go ./main.go
Examine the output:
package main

import "fmt"

func main() {
        fmt.Println("Hello, World!")
}
It's also possible to copy back the whole workdir folder, which is ideal when opencode has created multiple files and folders.
mkdir -p workdir-out
sudo slicer vm cp --mode=tar --uid 1000 opencode-1:/home/ubuntu/workdir/ ./workdir-out
Then, examine the contents:
sudo find workdir-out

workdir-out
workdir-out/main.go
workdir-out/hello.go
workdir-out/workdir
workdir-out/task.txt
Taking opencode automation further
Once a microVM has been started, you can run the opencode agent in prompt mode any number of times, or limit it to just a single prompt.
One advantage of keeping a microVM alive, is that you can follow-up if the results are not as expected, or give it further direction.
A practical application of opencode in a Slicer sandbox, is for code reviews linked to a Source Control Management (SCM) system like GitHub or GitLab.
The CLI can be driven manually or via bash, for our own code review bot, we used the Go SDK.